
Functional Kitchen Island Ideas
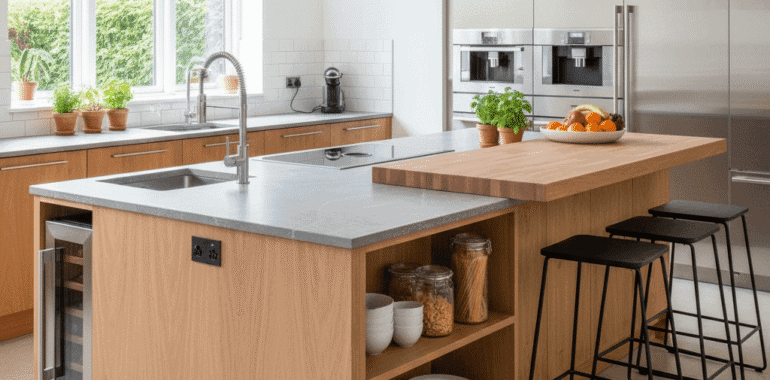
Functional Kitchen Island Ideas
Functional kitchen island ideas turn a central slab into the busiest and most useful spot in any home. Whether the kitchen is a tight galley or a wide open plan, a smart island adds storage, seating, and work surfaces that fit how people cook and hang out. Real examples show how to pick a design that works with everyday life and makes the kitchen feel alive. Keep reading to discover secrets that will make your kitchen the heart of the home.
Below you will find layout tips storage strategies seating solutions and technical recommendations that make islands work for everyday tasks and special occasions. Each section focuses on a clear problem and offers options you can adapt to your space and budget.
Plan the right size and circulation for Functional Kitchen Island Ideas
Start with measurements before you choose style or finish. A common rule is to allow at least 36 to 42 inches of clearance on the main walkway side and 42 to 48 inches if people will pass behind seated guests. For small kitchens a narrow island that is 18 to 24 inches deep provides extra countertop space without interrupting flow. Larger kitchens can host islands that are 36 inches deep or more to include seating or appliances.
Consider these layout approaches when planning size
- Work triangle focus for cooking households where the island is the prep zone keep sinks and cooktops within easy reach of the fridge and range.
- Social center for families and hosts choose an island that supports at least two sides of seating and leaves room for service during gatherings.
- Split function use one end for prep and the other for casual eating to separate tasks and reduce traffic conflicts.
Storage smart solutions that make islands truly useful
Storage is a primary reason homeowners select islands. Deep drawers store pots and pans more accessibly than base cabinets. Pull out organizers for trays and cutting boards reduce clutter. Open shelving can work for frequently used items but combine it with enclosed storage for less attractive items.
Drawer options and internal layouts
Full extension drawers with soft close hardware allow deep access to large cookware. Consider shallow top drawers for utensils and specialized dividers for knives and gadgets. For heavier items choose drawers rated for higher load capacities. Drawers facing the cook area should store the items used most often for quick reach.
Hidden storage features
Slide out pantries and tilt out bins for trash and recyclables keep counters clear. A built in spice drawer near the cooktop streamlines seasoning while an appliance garage tucks mixers and blenders away but keeps them ready. Think about multiple zones within the island to separate seldom used items from daily necessities.
Seating and social zones that work with activity levels
Decide how the island will be used socially before locking in dimensions. Counter height seating at 36 inches is standard for bar stools and casual dining. For a more formal seated experience plan a raised bar area or a lower seated peninsula for children and guests who prefer table height.
- Allow 24 inches of linear space per person for comfortable seating when using bar stools.
- Overhang of 10 to 12 inches accommodates legs for counter height seating. If plumbing or storage limit overhang consider knee space cabinets with a false front to create leg room.
- Design the island so the cook is facing guests if you host often. Facing the room invites conversation and keeps traffic out of the active prep zone.
Multi purpose islands with integrated appliances and prep stations
Islands that hold a sink cooktop or wine fridge remove steps from tasks and centralize work. A prep sink near the main sink reduces movement when filling pots and rinsing produce. Built in ovens or microwaves in the island can be easier to access than wall units for some household members.
Cooktop islands and ventilation considerations
If you plan a cooktop on the island think about ventilation. Downdraft vents can work for light use but range hoods remain the most reliable choice for heavy cooking. Ensure ducting options are feasible before finalizing island location and that the hood height allows comfortable sight lines.
Sinks and dishwasher placement
Placing the dishwasher near the island sink shortens cleanup time. Allow at least 24 inches on one side of the sink for prep and drying. Consider a shallow worktop sink for quick tasks while preserving a full sink for heavy duty dishes.
Material and finish choices that balance looks and maintenance
Countertop materials vary in price and upkeep. Durable options include quartz and certain natural stones that resist stains and scratches. Wood butcher block warmth pairs well with casual kitchens but requires periodic sealing and gentle cleaning. Laminate offers a budget friendly surface that performs well with high quality edges and water resistant cores.
- Consider edges that stand up to traffic as islands take more bumps than perimeter counters.
- Choose cabinet finishes that hide fingerprints and scuffs if your household has children or pets.
- Select hardware finishes that coordinate with faucet and lighting choices for a unified look.
Lighting and electrical planning for island function
Good lighting makes an island safe and usable. Layer task lighting under pendants or recessed fixtures with ambient ceiling light and under cabinet LEDs for work surfaces. Pendants should hang low enough to highlight the work area but high enough so sight lines are not blocked for seated guests.
Plan electrical outlets for small appliances charging stations and undercounter refrigeration. Code requires accessible outlets and many homeowners prefer at least two on an island depending on size. Think about USB or dedicated charging drawers to keep cords out of sight.
Low cost upgrades that raise daily usefulness
You do not need to spend a fortune to improve island functionality. Adding pull out trash drawers installing a knife block insert and switching to full extension drawer slides make a big difference. Installing a magnetic strip for knives or a mounted paper towel holder clears countertop space without major construction.
- Install trade quality hinges and drawer slides for better longevity and smoother action.
- Add a cutting board insert at one work station to protect counters while keeping a dedicated prep area.
- Consider under counter lighting that turns on with a switch or motion sensor to illuminate work at night.
If you are researching options near Orlando and want a local source for tailored island cabinetry consider reaching out to a regional workshop for examples and pricing. A supplier that shows installation photos and real projects helps visualize what will work in your home and simplifies planning. For a practical starting point check this local resource that displays project samples and material choices including layout examples and storage solutions Orlando Custom cabinets
Common mistakes to avoid when designing a kitchen island
Avoid islands that block sight lines to key areas like entrances or windows. Underestimating clearance creates pinch points and makes the space feel cramped. Another frequent oversight is neglecting maintenance needs when choosing materials. For example a porous stone may need sealing more often than homeowners expect.
- Do not place seating so it interferes with cabinet doors or appliance access.
- Do not rely on a single small outlet for multiple heavy appliances without planning load distribution.
- Do not forget to align cabinet hardware with appliance handles and drawer fronts for smooth operation.
Test walk the kitchen with cardboard mockups to visualize scale before committing. Tape outlines on the floor or build a temporary frame to check traffic and seating comfort. This low cost exercise prevents costly changes after installation.
Conclusion
Functional Kitchen Island Ideas require clear goals and practical trade offs. Start with how people will use the island daily and choose size storage and seating solutions that solve real needs. Material choices and mechanical details like drawer slides lighting and outlets play a huge role in long term satisfaction. Use mockups to test scale and request sample finishes to confirm appearance under your lighting.
If you are planning a renovation take time to list must have functions and nice to have features. Prioritize durable finishes in high use zones and design storage that keeps the counter clear. Consider consulting local carpentry or cabinet specialists to review plumbing and electrical options before final drawings are set. Good planning reduces surprises on installation day and yields an island that serves cooking hosting and daily living for years.
Ready to move from ideas to a plan that fits your home and budget Contact a local cabinet professional to review measurements and layout options. A short consultation can reveal which features will make the biggest difference and provide a clear path to installation that matches your schedule and needs.